> ## Documentation Index
> Fetch the complete documentation index at: https://aitextura.mintlify.site/llms.txt
> Use this file to discover all available pages before exploring further.
# Create an agent
> A three-step wizard: pick a role, pick an engine, wait for deployment. The agent is ready to work in about a minute.
You don't need to set up a server or configure an environment: you pick a role from a ready-made list, and the platform deploys a container and writes the agent's personality for you. From clicking the button to the first message takes about a minute.
## Hire an agent
The **Agents** section in the left menu is a shared list of all agents and AI Employees on the account.
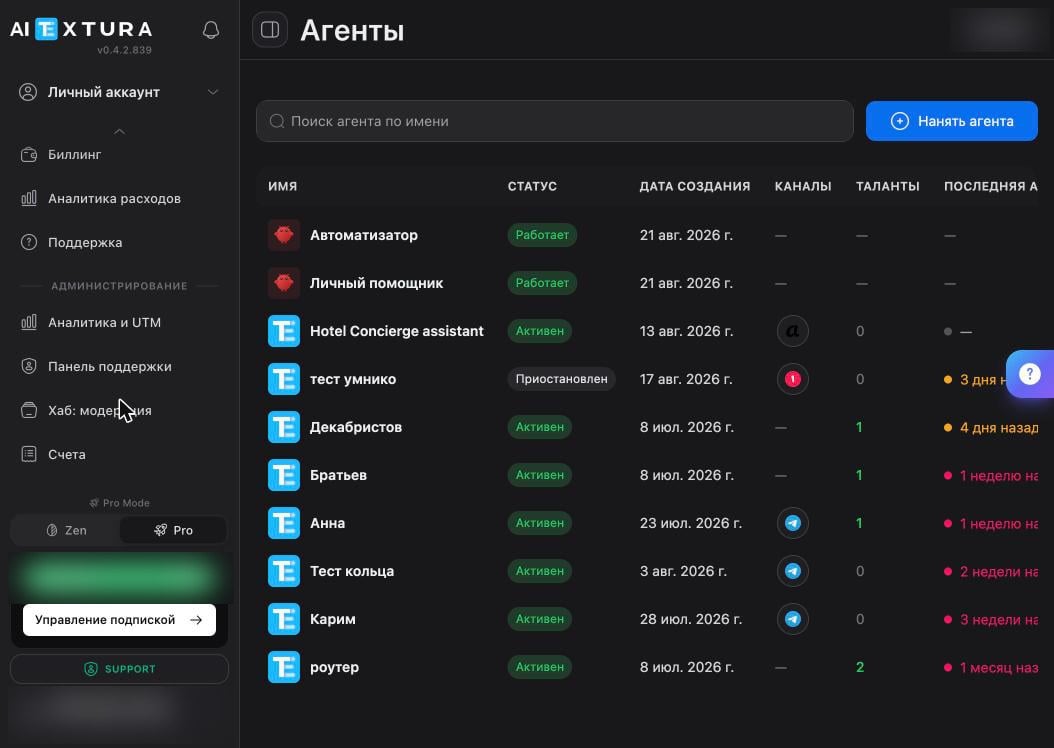 | Column | What it shows |
| ----------------- | ------------------------------------------------ |
| **Name** | The agent's name; click it to open its workspace |
| **Status** | Running · Active · Paused |
| **Channels** | Icons of connected messengers |
| **Talents** | How many personas and skills are connected |
| **Last Activity** | When the agent last did something |
| **Live chat** | Opens the conversation right from the list |
On the right of each row is an on/off toggle and a `...` menu with actions, including delete. At the top are a name search and the blue **+ Hire Agent** button — that's where it all starts.
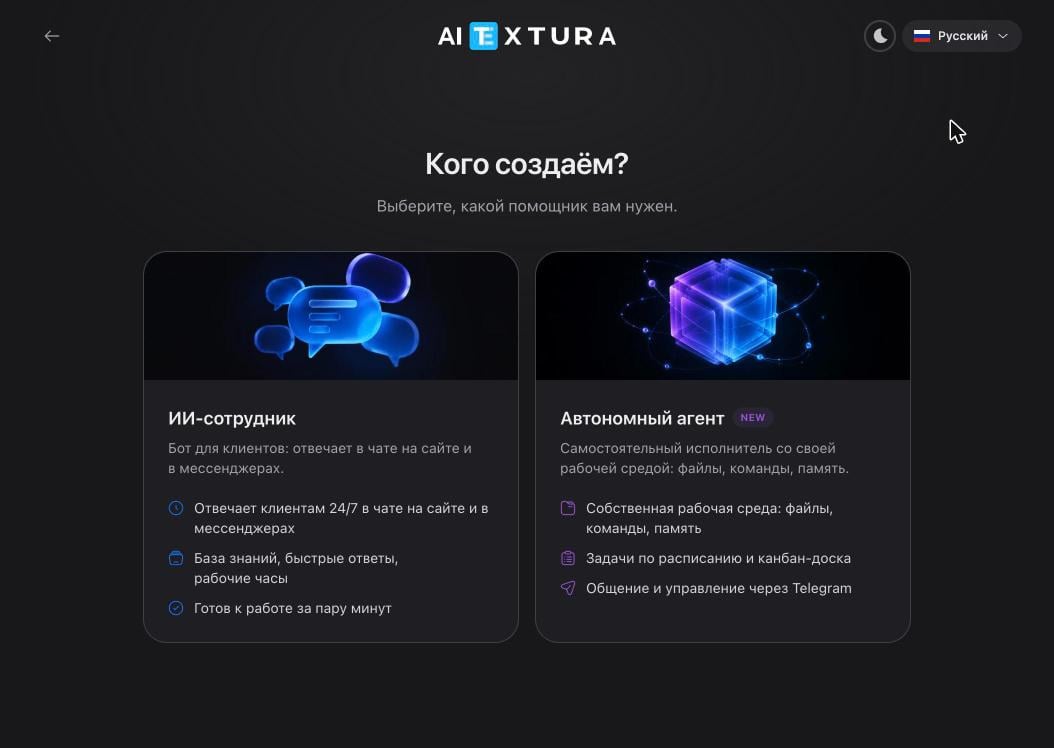
The first wizard step, **"What are we creating?"**, has two cards: **AI Employee** (a bot for customers) and **Autonomous Agent** (an independent worker with its own workspace). Click the second one.
| Column | What it shows |
| ----------------- | ------------------------------------------------ |
| **Name** | The agent's name; click it to open its workspace |
| **Status** | Running · Active · Paused |
| **Channels** | Icons of connected messengers |
| **Talents** | How many personas and skills are connected |
| **Last Activity** | When the agent last did something |
| **Live chat** | Opens the conversation right from the list |
On the right of each row is an on/off toggle and a `...` menu with actions, including delete. At the top are a name search and the blue **+ Hire Agent** button — that's where it all starts.
The first wizard step, **"What are we creating?"**, has two cards: **AI Employee** (a bot for customers) and **Autonomous Agent** (an independent worker with its own workspace). Click the second one.
 The **"Where do we start?"** step shows ready-made roles, each with a predefined personality and workflow. Six cards are visible; the **Show more** link expands all 25.
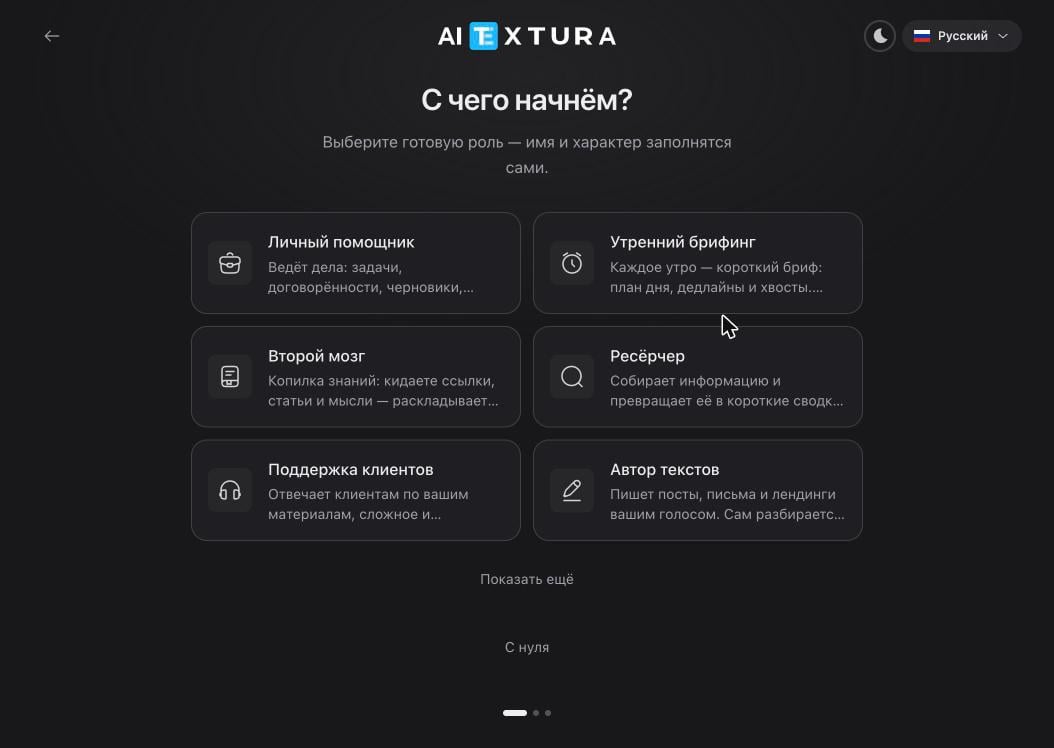 The **From scratch** link below the list creates an agent without a preset — you'll have to write its name and personality yourself. For the full list of roles and what they do, see [Roles](/en/agents/roles).
The **"Set up the agent"** step. The **Name** field is prefilled with the role name; you can change it. Below it, choose the engine.
The **From scratch** link below the list creates an agent without a preset — you'll have to write its name and personality yourself. For the full list of roles and what they do, see [Roles](/en/agents/roles).
The **"Set up the agent"** step. The **Name** field is prefilled with the role name; you can change it. Below it, choose the engine.
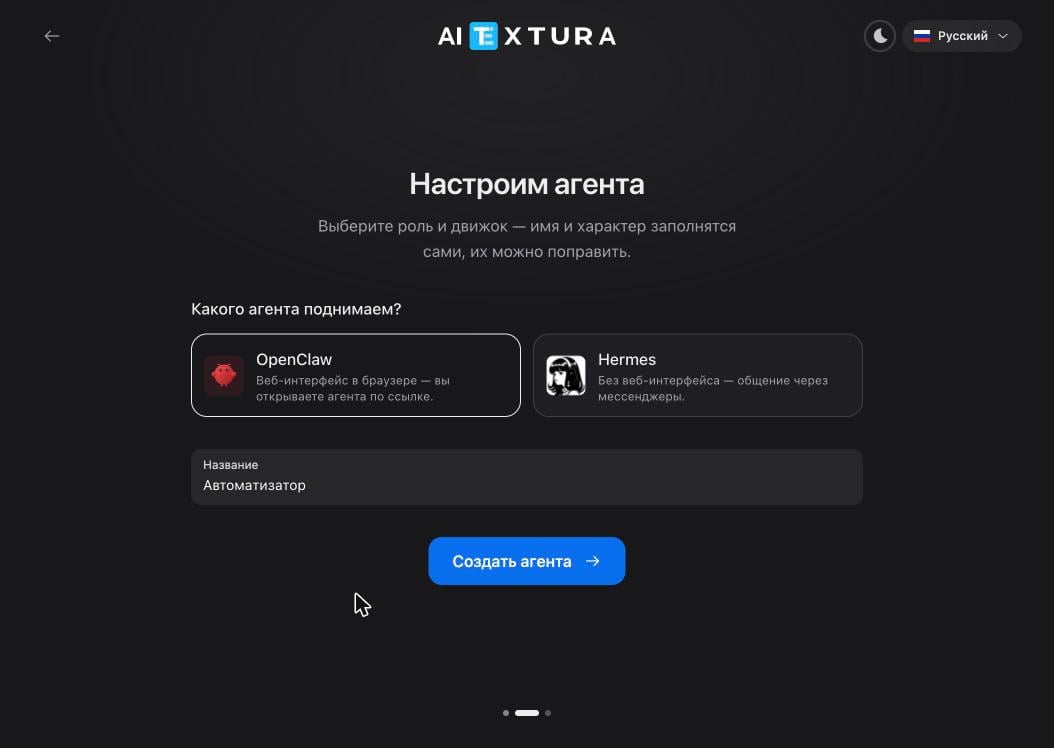 | Engine | What it means |
| ------------ | ------------------------------------------------------------------------------------------------------------ |
| **OpenClaw** | The agent has its own web interface — you open it via a link and see the full workspace. Selected by default |
| **Hermes** | No web interface: all communication and management go through messengers |
Click **Create agent →**.
Right after creation, the platform offers to connect Telegram — no token needed; the bot is created in a couple of taps. You can put this off: the **Skip for now** link moves on, and you can connect a channel later from the workspace.
Details: [Connect](/en/agents/connect).
The **"Deploying the agent"** screen shows a timer and five stages: starting the container → preparing the workspace → connecting tools → setting up work rules → final checks.
| Engine | What it means |
| ------------ | ------------------------------------------------------------------------------------------------------------ |
| **OpenClaw** | The agent has its own web interface — you open it via a link and see the full workspace. Selected by default |
| **Hermes** | No web interface: all communication and management go through messengers |
Click **Create agent →**.
Right after creation, the platform offers to connect Telegram — no token needed; the bot is created in a couple of taps. You can put this off: the **Skip for now** link moves on, and you can connect a channel later from the workspace.
Details: [Connect](/en/agents/connect).
The **"Deploying the agent"** screen shows a timer and five stages: starting the container → preparing the workspace → connecting tools → setting up work rules → final checks.
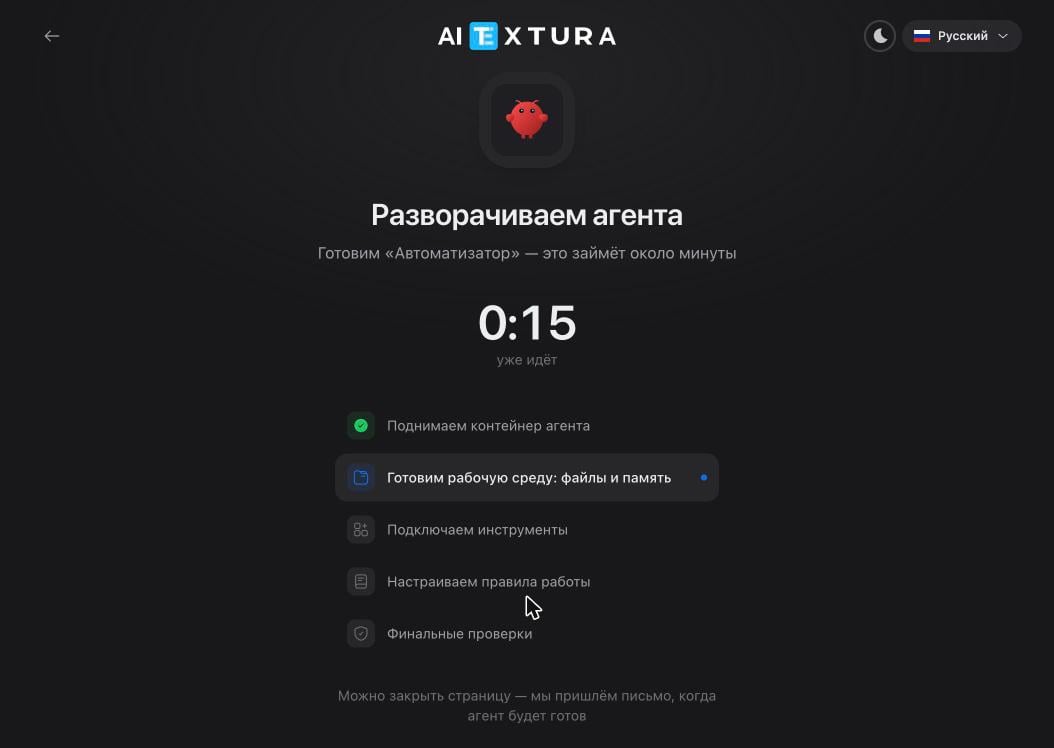 In our run, this took 55 seconds. You can close the page — the platform will email you when the agent is ready.
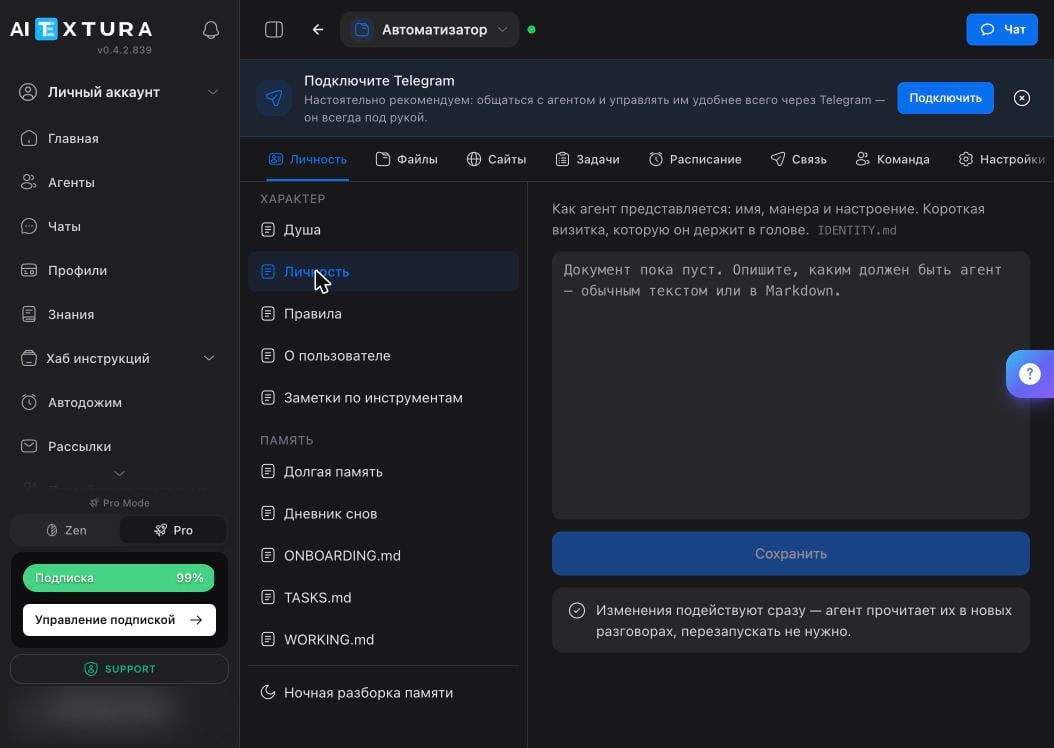 ## Check it
Open the agent and click **Chat** in the top-right corner of the workspace — a side panel with the conversation opens.
## Check it
Open the agent and click **Chat** in the top-right corner of the workspace — a side panel with the conversation opens.
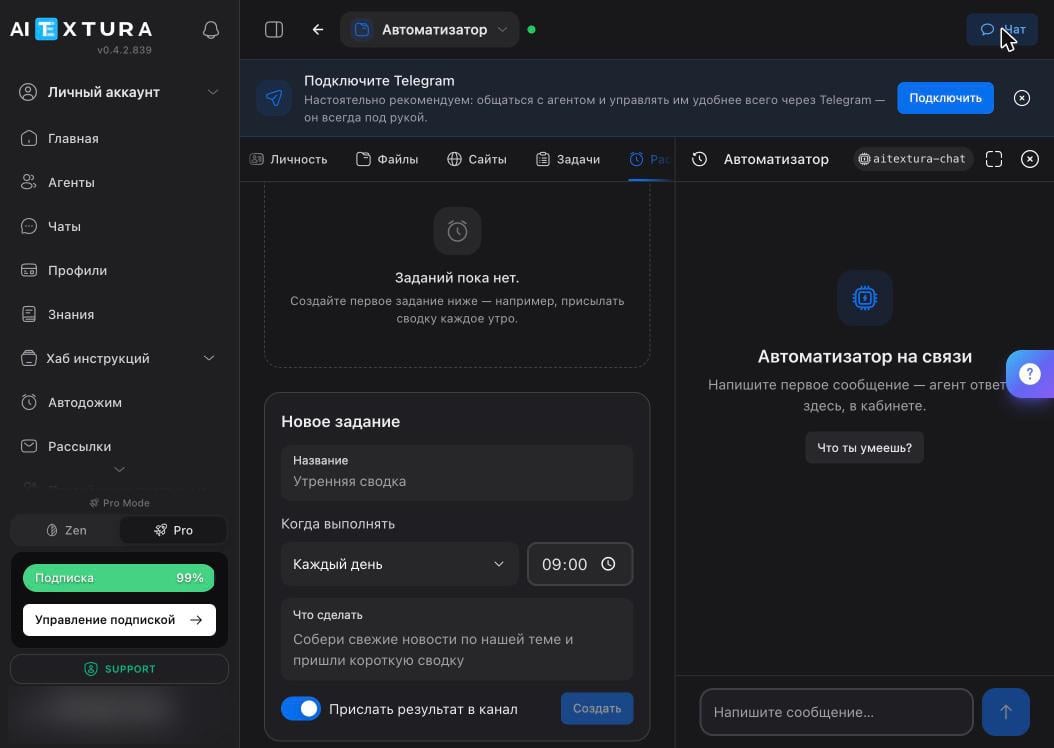 Type "Hi". A fresh agent won't reply with a canned phrase — it starts getting to know you: asks how to address you and suggests a name for itself. This is the [first run](/en/agents/first-run) — it's written in a file on the agent's side and runs once.
A green dot next to the agent's name at the top means the container is running. If the dot isn't green, check [Maintenance](/en/agents/maintenance) — it has restart and diagnostics.
## Agent limit
An account can have **no more than two agents** deployed at a time. If you try to create a third, the platform shows a warning and won't let you continue.
To free up a slot: **Agents** → the `...` menu of the agent you don't need → **Delete** → confirm by typing its name. After that, the creation wizard works again.
Deletion is permanent: the agent's files, memory, and conversations go with it. If you still need the data, download a [backup](/en/agents/maintenance) first.
## FAQ
Keep **OpenClaw** — it's selected by default and gives the agent its own web interface that opens via a link. Hermes is for when you don't need a web interface at all and all communication goes through a messenger.
No. A role is starting personality text, not a hard setting: open [Personality](/en/agents/personality) and rewrite the **Soul** document for your task. Changes take effect immediately; no restart needed.
Wait for the email — you can close the page; the process runs on the platform side. If the agent never shows up in the list, contact [Support](/en/guides/support).
Yes, click **Skip for now**. You can talk to the agent right in the workspace using the **Chat** button. Telegram can be connected later on the [Connect](/en/agents/connect) tab — its main purpose is getting results on your phone.
Check the status: a green dot next to the name means the container is running. If the agent was just restarted or you changed settings that require a restart, wait 20–30 seconds. Next step: **Settings → Management → Diagnostics**.
## What's next
What the agent asks in the first conversation and how to answer
Connect Telegram and manage the agent from your phone
Personality and memory files: what's in them and what to add
25 ready-made roles and what each one does
Type "Hi". A fresh agent won't reply with a canned phrase — it starts getting to know you: asks how to address you and suggests a name for itself. This is the [first run](/en/agents/first-run) — it's written in a file on the agent's side and runs once.
A green dot next to the agent's name at the top means the container is running. If the dot isn't green, check [Maintenance](/en/agents/maintenance) — it has restart and diagnostics.
## Agent limit
An account can have **no more than two agents** deployed at a time. If you try to create a third, the platform shows a warning and won't let you continue.
To free up a slot: **Agents** → the `...` menu of the agent you don't need → **Delete** → confirm by typing its name. After that, the creation wizard works again.
Deletion is permanent: the agent's files, memory, and conversations go with it. If you still need the data, download a [backup](/en/agents/maintenance) first.
## FAQ
Keep **OpenClaw** — it's selected by default and gives the agent its own web interface that opens via a link. Hermes is for when you don't need a web interface at all and all communication goes through a messenger.
No. A role is starting personality text, not a hard setting: open [Personality](/en/agents/personality) and rewrite the **Soul** document for your task. Changes take effect immediately; no restart needed.
Wait for the email — you can close the page; the process runs on the platform side. If the agent never shows up in the list, contact [Support](/en/guides/support).
Yes, click **Skip for now**. You can talk to the agent right in the workspace using the **Chat** button. Telegram can be connected later on the [Connect](/en/agents/connect) tab — its main purpose is getting results on your phone.
Check the status: a green dot next to the name means the container is running. If the agent was just restarted or you changed settings that require a restart, wait 20–30 seconds. Next step: **Settings → Management → Diagnostics**.
## What's next
What the agent asks in the first conversation and how to answer
Connect Telegram and manage the agent from your phone
Personality and memory files: what's in them and what to add
25 ready-made roles and what each one does