Persona
Define how your agent communicates
FAQ
Prepared answers and self-learning
Talents
Connect integrations and services
AI Employees
Manage all your virtual agents
Persona defines how the employee responds (tone, style, behavior). Knowledge Base defines what it knows (facts, data, documents). These two tools work together: an instruction in the Persona can direct the employee to specific data from the knowledge base.
Video walkthrough
A short video: how to upload documents and web pages into the knowledge base and connect them to an AI employee.
Two Places to Work with Knowledge
AI Textura has two related but distinct sections for working with knowledge:| Section | Location | Purpose |
|---|---|---|
| Knowledge | Left sidebar menu | Central repository of all sources across all employees |
| Knowledge Base | Tab in a specific employee’s settings | Select which sources from the repository to connect to the agent |
- Uploading via the agent’s “Knowledge Base” tab — the file automatically lands in that agent’s subfolder inside Agents and is immediately connected to the employee.
- Uploading via the “Knowledge” section in the left menu — the file goes to the folder you selected, but is not automatically connected to any employee. You must manually check the checkbox in the desired agent’s Knowledge Base tab.
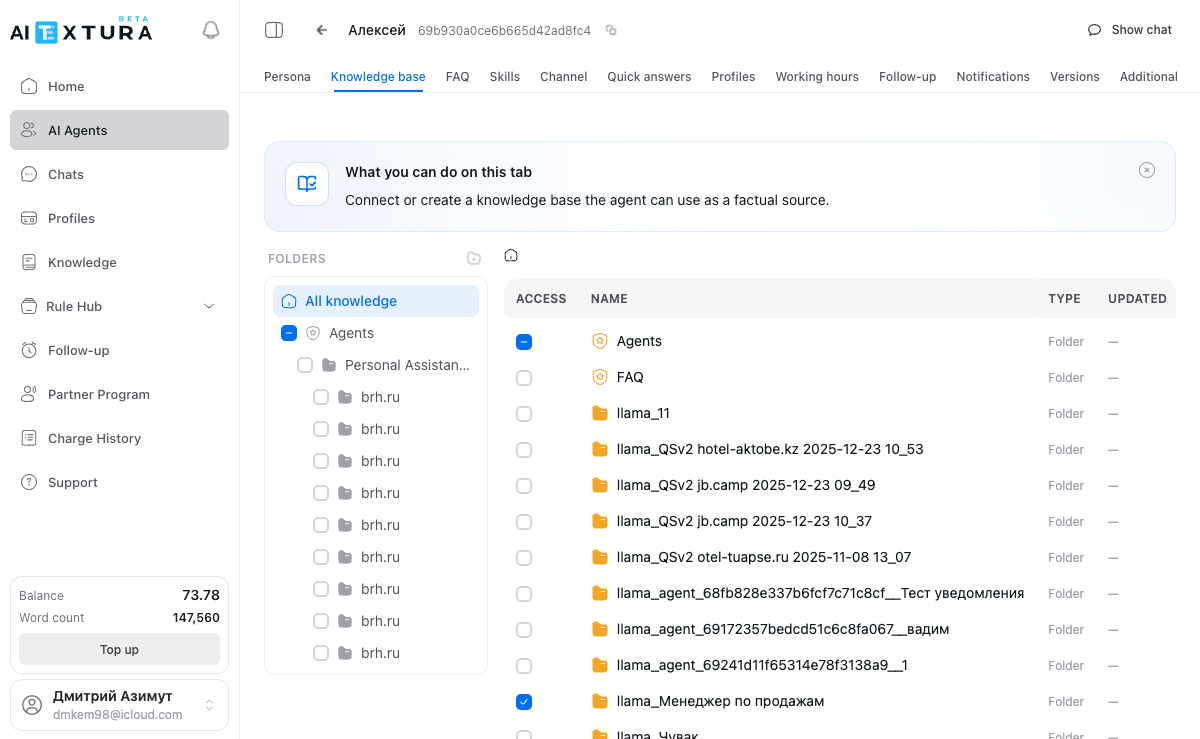
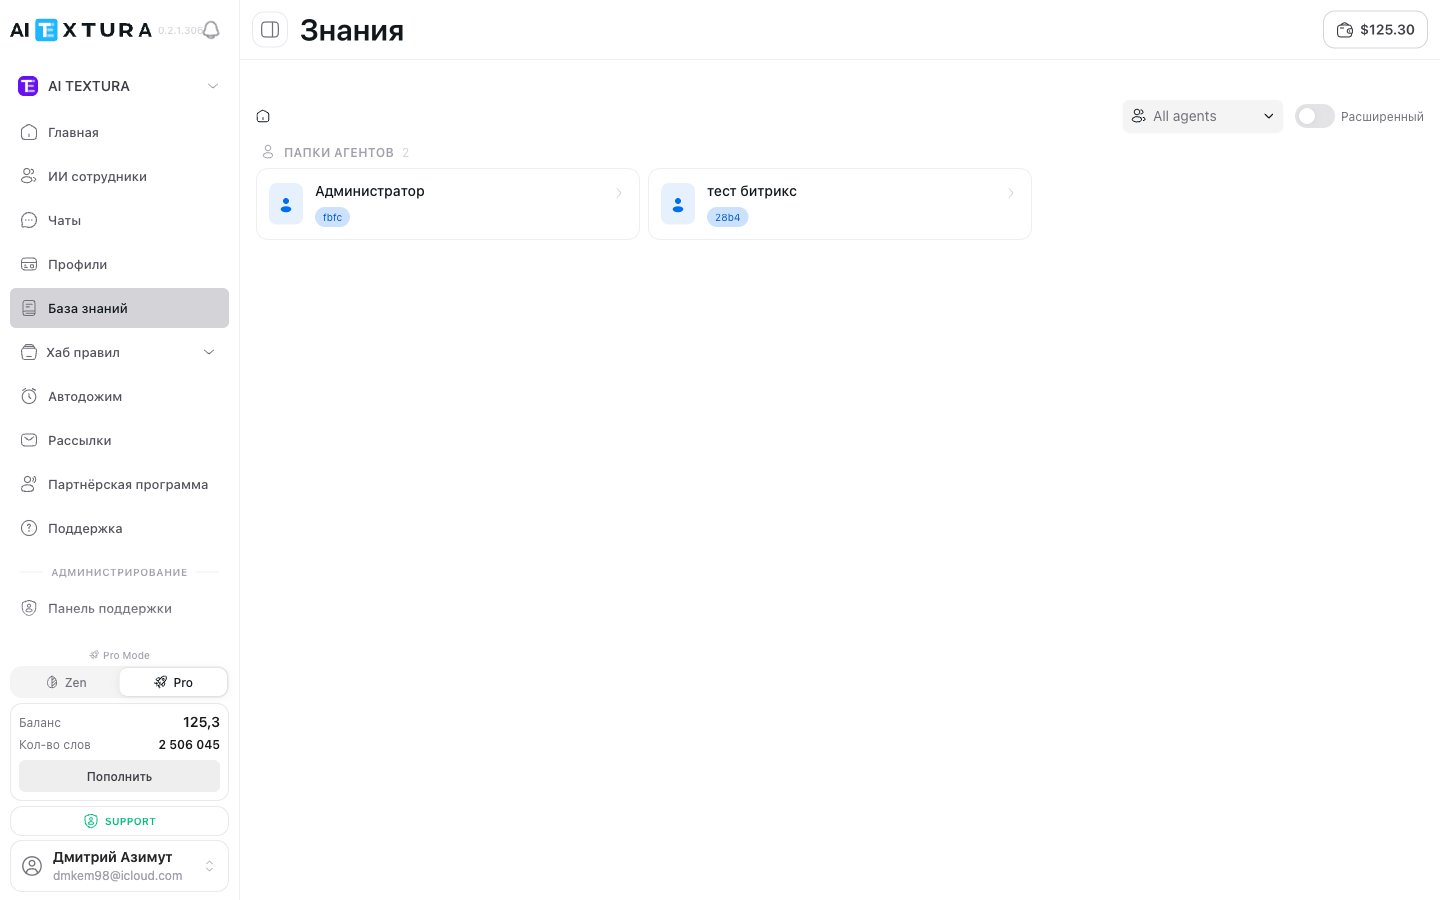
”Knowledge” Section — Central Repository
The Knowledge section in the left sidebar is a shared repository of files and information sources across all employees. Here you can:- See the full picture: which sources are uploaded and which employees they are connected to
- Organize information into folders
- Add new sources
- Delete outdated data
Interface
The screen is split into two parts: Left panel — folder tree. A hierarchical structure of all knowledge. At the top level is the root folder All knowledge. Click any folder to display its contents in the right panel. Right panel — file table. When you select a folder, a Knowledge files table appears:| Column | What it shows |
|---|---|
| Name | File name, URL, or text source name |
| Type | Element type: Folder, Text, File, Web, etc. |
| Updated | Date of last update |
- Breadcrumbs — navigation through folder levels
- Agent selector (
All agents) — show sources connected to a specific employee - Mode tabs (
Extended/ basic) — switch between display modes - Add button — create folders and upload sources
Agent Selector
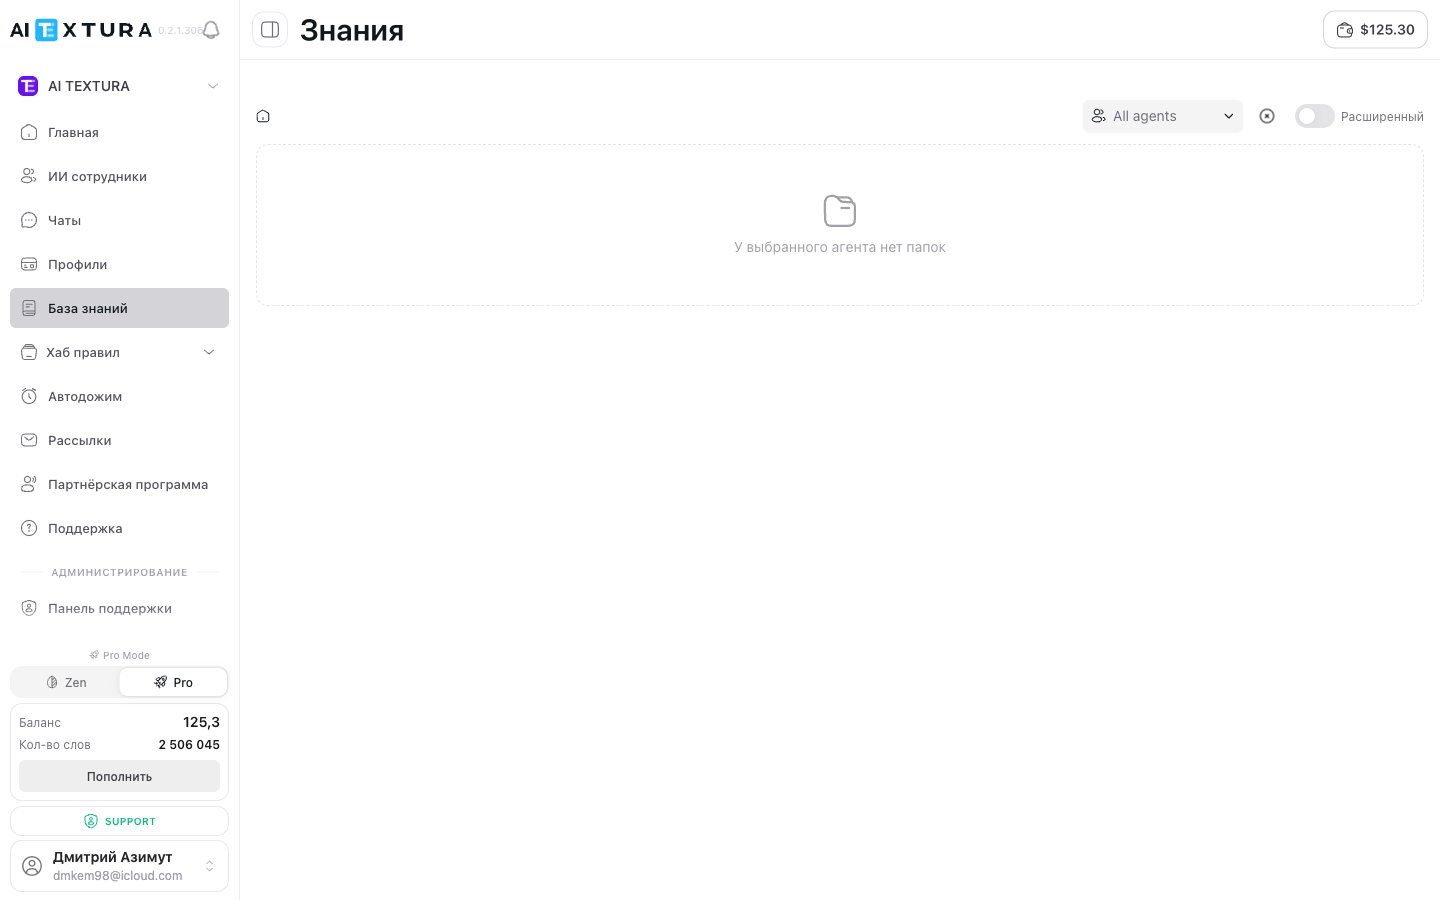
Above the table there is an All agents dropdown. This is the page’s central filter:| Selection | What it shows |
|---|---|
| All agents | All sources and folders for all employees — overall view |
| Specific employee | Only the sources connected to that employee. The folder tree collapses to the relevant branches |

Extended and basic modes
The tabs next to the agent selector switch the page view:
| Mode | What it shows |
|---|---|
| Basic | A simple folder hierarchy and file table. Fits when there are few sources and you only need to add/remove files |
| Extended | Expanded navigation with Agent folders (a separate branch per employee), a system FAQ folder, and custom folders. Useful as the knowledge library grows and sources get split across multiple employees |
Agent folders
In Extended mode, a separate subfolder is created automatically inside the Agents branch for each employee. Any source you upload from an employee’s Knowledge Base tab lands here. The folder name matches the employee’s name. Example structure:Price lists 2026) across multiple employees at once.
Folder Structure
By default, the system organizes knowledge as follows:- Agents — a system folder. Subfolders are automatically created for each employee when you add sources via the Knowledge Base tab in the agent’s settings.
- FAQ — a folder for entries from the self-learning section that have been sent to the knowledge base.
- Custom folders — create them at any level to organize by topic, department, or project.
Creating a Folder
You can create folders within folders for deeper organization, for example: Price lists → Summer 2026, Price lists → Winter 2026.
”Knowledge Base” Tab — Per-Employee Settings
Open the desired AI employee → Knowledge Base tab. Here you select which sources from the shared repository to connect to this agent.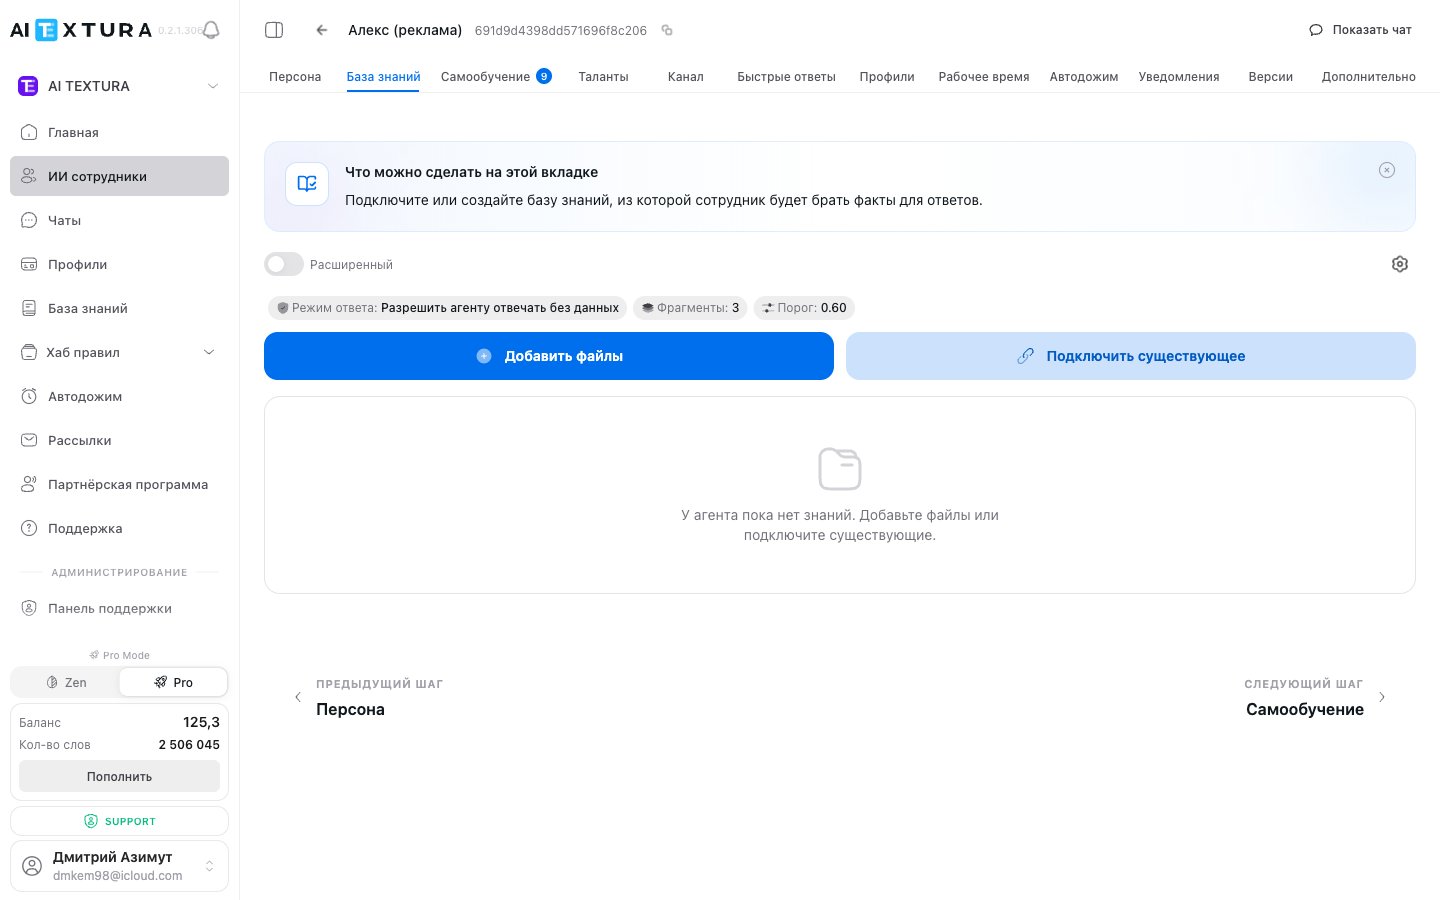
Interface
The screen is split into two parts: Left panel — folder tree. All folders with knowledge sources. Each folder has a checkbox:| Checkbox state | Meaning |
|---|---|
| Checked | Sources from this folder are connected to the current employee |
| Unchecked | Sources are not in use |
| Partially checked | Some sources inside are connected, some are not |
| Column | What it shows |
|---|---|
| Access | Checkbox — whether the source is connected to this employee |
| Name | File name, URL, or text source name |
| Type | Source type (Text, Folder, etc.) |
| Updated | Date of last update |
Connecting Sources to an Employee
Four Ways to Add a Knowledge Source
While in the desired folder (in either section), click the Add source button. Four options are available:1. Upload Files
Upload documents from your computer. Supported formats:| Format | Description |
|---|---|
| Documents, price lists, catalogs | |
| DOCX | Word text documents |
| TXT | Plain text files |
| CSV | Data tables |
2. Text
Manual entry or paste text directly into the platform.| Field | Description |
|---|---|
| Name (optional) | A clear name for the source |
| Content | The text itself — paste or type manually |
3. YouTube Video
Import a video transcript from YouTube. Enter the URL — the platform will automatically extract text from subtitles. When to use: useful information is contained in video reviews, presentations, or educational videos.4. Web Page
Import content by URL. Supports regular websites, Google Docs, and Google Sheets.| Parameter | Description |
|---|---|
| URL | Page address |
| Parse mode | Single page — only the specified URL. Full site — recursive crawl of all pages |
Updating Knowledge
Uploaded sources do not update automatically. If a price list has changed, the employee will continue using the old data.Actions Summary Table
| Action | Where to do it |
|---|---|
| Upload a new source | Knowledge (left menu) or Knowledge Base (agent tab) |
| Connect a source to an employee | Knowledge Base (agent tab) — via checkboxes |
| View all sources across all employees | Knowledge (left menu) |
| Delete a source from the system | Knowledge (left menu) |
| Disconnect a source from an employee (without deleting) | Knowledge Base (agent tab) — uncheck the box |
Usage Examples
Hotel -- centralized knowledge base
Hotel -- centralized knowledge base
A hotel uploaded sources to the Knowledge section and organized them into folders:“General documents” and “Restaurants and spa” are connected to both employees. “Transfers” is connected only to the Concierge. When spa prices changed, the manager deleted the old file and uploaded a new one. Both employees immediately received up-to-date data.
Online store -- separation by department
Online store -- separation by department
Two agents: “Product Consultant” and “Customer Support”.
- Catalog — product descriptions, specs, availability. Connected only to the Consultant.
- Policies — returns, shipping, warranty. Connected only to Customer Support.
- General — contacts, business hours, promotions. Connected to both.
Online school -- uploading a schedule
Online school -- uploading a schedule
The school uploaded a class schedule as a CSV and connected it to the curator agent. Students ask “When is the next marketing class?” — the curator finds the answer in the table. The schedule is updated monthly: the admin deletes the old CSV and uploads the new one.
Best Practices
- Clear file names. “Price list 2026 March.pdf” is immediately understandable. “Document_final_v3(2).pdf” is not.
- Don’t upload everything. Each extra source is context the employee searches through. More irrelevant documents mean a higher chance of inaccurate answers.
- Structure your documents. Use headings, lists, and tables. A long unstructured document is better split into several thematic files.
- Test after uploading. Open a test chat and ask questions about the uploaded information.
- Keep data current. Outdated data means incorrect answers. The employee does not know the information is stale.
FAQ
How many sources can I add?
How many sources can I add?
There is no limit on the number of sources. However, more sources means more tokens spent on search — only add what the employee truly needs.
Does data update automatically?
Does data update automatically?
No. All knowledge is static. If the original document has changed, you need to delete the old source and upload a new version. There is no automatic synchronization.
Can I use one source for multiple employees?
Can I use one source for multiple employees?
Yes. A source is stored in the Knowledge section and can be connected to any number of employees via checkboxes in each agent’s Knowledge Base tab.
What happens if I delete a source in the Knowledge section?
What happens if I delete a source in the Knowledge section?
It disappears from all employees it was connected to. If you only need to remove a source from one agent, uncheck the box in the Knowledge Base tab instead of deleting the file.
The employee is not using data from the knowledge base. What should I do?
The employee is not using data from the knowledge base. What should I do?
Check three things: (1) the source is connected — the checkbox is checked in the Knowledge Base tab; (2) the information is well-structured — use headings and lists; (3) the Persona includes an instruction like “answer based on knowledge base data, do not make things up.”
Does folder structure affect how the employee works?
Does folder structure affect how the employee works?
No. Folders are a tool for your convenience. The employee searches across all connected sources regardless of their folder location.
What is better: uploading a file or entering text?
What is better: uploading a file or entering text?
If the information already exists in a document, upload the file. If you need a brief reference (address, contacts, a short rule), use text. For current information from a website, import the web page.