Persona
Use profile data inside the employee’s instructions
AI Employees
Manage employees and their settings
Chats
Conversation history with clients
Dashboard
Aggregated analytics across all employees
“Profiles” refers to two different places in the interface.
- Profiles tab in the AI employee settings — this is where you configure which fields to collect and when to fill them. This is the configuration.
- Profiles section in the platform’s left menu — this is where filled client cards are stored. This is the analytics tool.
Video walkthrough
Profiles function
Analytics and profiles
A short video: how to configure profile fields on an agent, what is stored in the Profiles section, and how to use the collected data for analytics.
Setting up profile fields
Open the desired AI employee → Profiles tab. On this tab you describe which fields of the client profile the employee should fill in and when to do so. Fields are tied to a specific agent: different employees can collect different sets of data.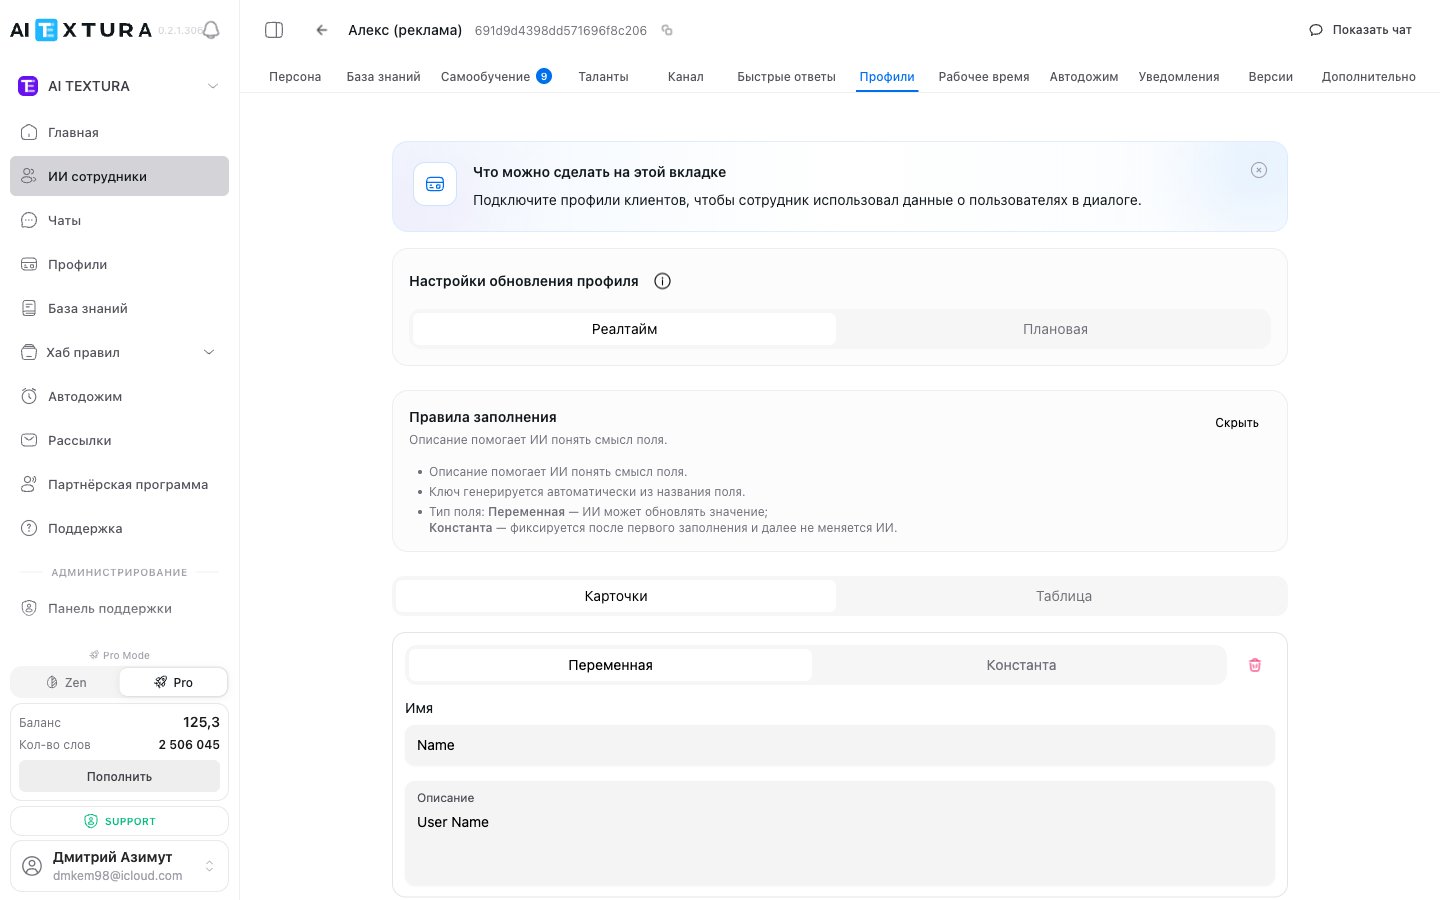
Update mode
The first thing to choose is when the employee updates the profile.| Mode | When it updates | When to use |
|---|---|---|
| Realtime | After every client message | When the employee needs the data right away — e.g., to address the client by name or consider their preferences within the same conversation |
| Scheduled | On a schedule (e.g., once every 24 hours) | When data is only needed for analytics and reporting |
Field types
Each field has a type that determines whether the employee can update its value.| Type | Behavior | Example |
|---|---|---|
| Variable | Updated with each new mention | Language, preferences, status, current interest |
| Constant | Set once and never changes | Contract number, date of birth, client type |
Field properties
Each field consists of four properties:| Property | What to enter |
|---|---|
| Name | A clear field label: “Name”, “Language”, “Request status” |
| Description | Instructions for the AI — when and what to fill in. This is the most important property |
| Key | Auto-generated, no changes needed |
| Type | Variable or Constant |
How to add a field
Fill in the description
Describe in detail, from the client’s perspective, when and what to fill in. Specify the answer format.
Field examples
View field configuration examples
View field configuration examples
| Field | Type | Description for AI |
|---|---|---|
| Name | Variable | My name |
| Language | Variable | The language I communicate in. Choose one option: Russian, English, other |
| Preferences | Variable | Preferences or wishes I have mentioned. Update with each mention |
| Complaint | Variable | When I mention any problem. Describe briefly, no more than four words. Always update |
| Status | Variable | Current request status. Choose one option: new, in progress, resolved |
| Budget | Variable | When I mention a budget or amount. Record the number |
| Contract number | Constant | The contract or booking number I provided |
| Summary | Variable | Two sentences about what the conversation is about. Review the full history. Always update |
Profile fields and chat metadata
The fields configured on the agent’s Profiles tab automatically land in the metadata of every chat of this employee. That means:- In the Profiles section (left menu), you see these fields as columns of the table.
- In the Persona, you can reference these fields as variables — the employee will substitute values right in the dialog (see Persona).
- In chats, the metadata is accessible via the chat action menu → “Client profile”.
Field types in metadata
| Field type in setup | Stored in metadata as | Example |
|---|---|---|
| Text (Variable) | Free text | Name, City, Summary |
| Text with answer format (Variable) | One of the defined options | Language: Russian / English / other, Status: new / in progress / resolved |
| Text (Constant) | Fixed value, never changes after first fill | Contract number, Date of birth |
| Number (Variable) | Numeric value | Budget, Number of guests |
| Short description (Variable) | A few words or one sentence | Complaint (≤ 4 words), Summary (2 sentences) |
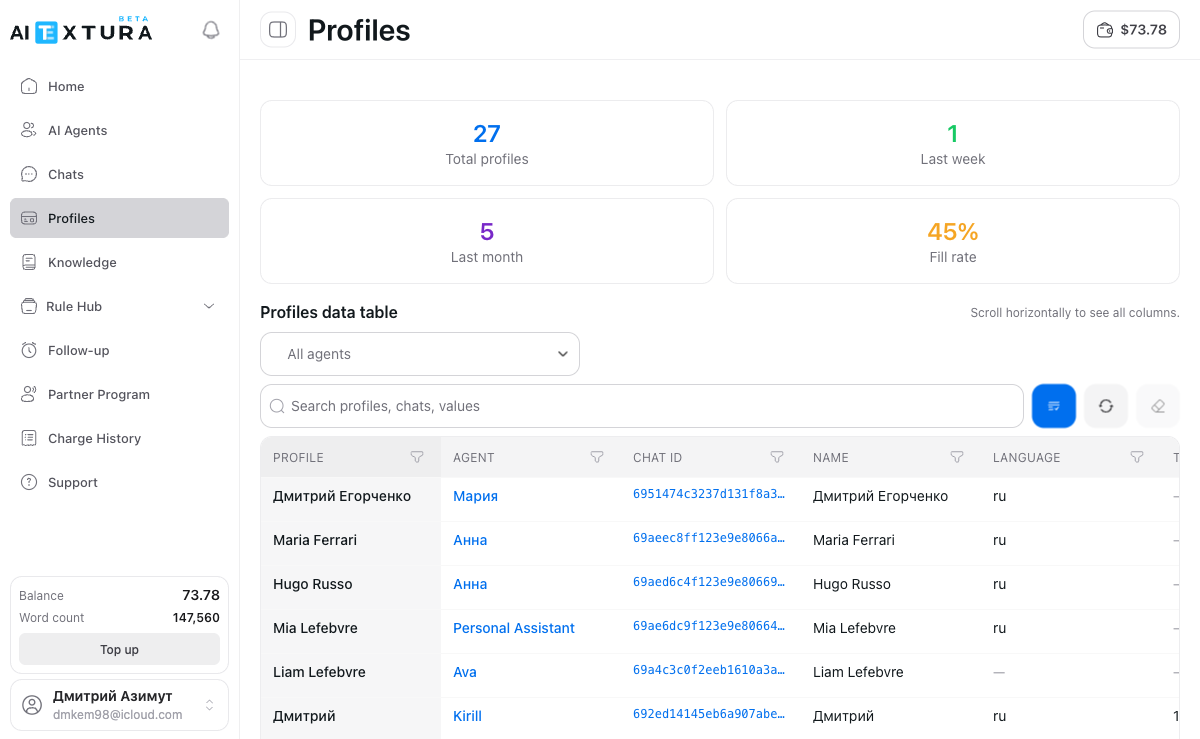
Profile analytics
The “Profiles” section in the platform’s left menu is an analytics tool. It stores filled client cards across all employees.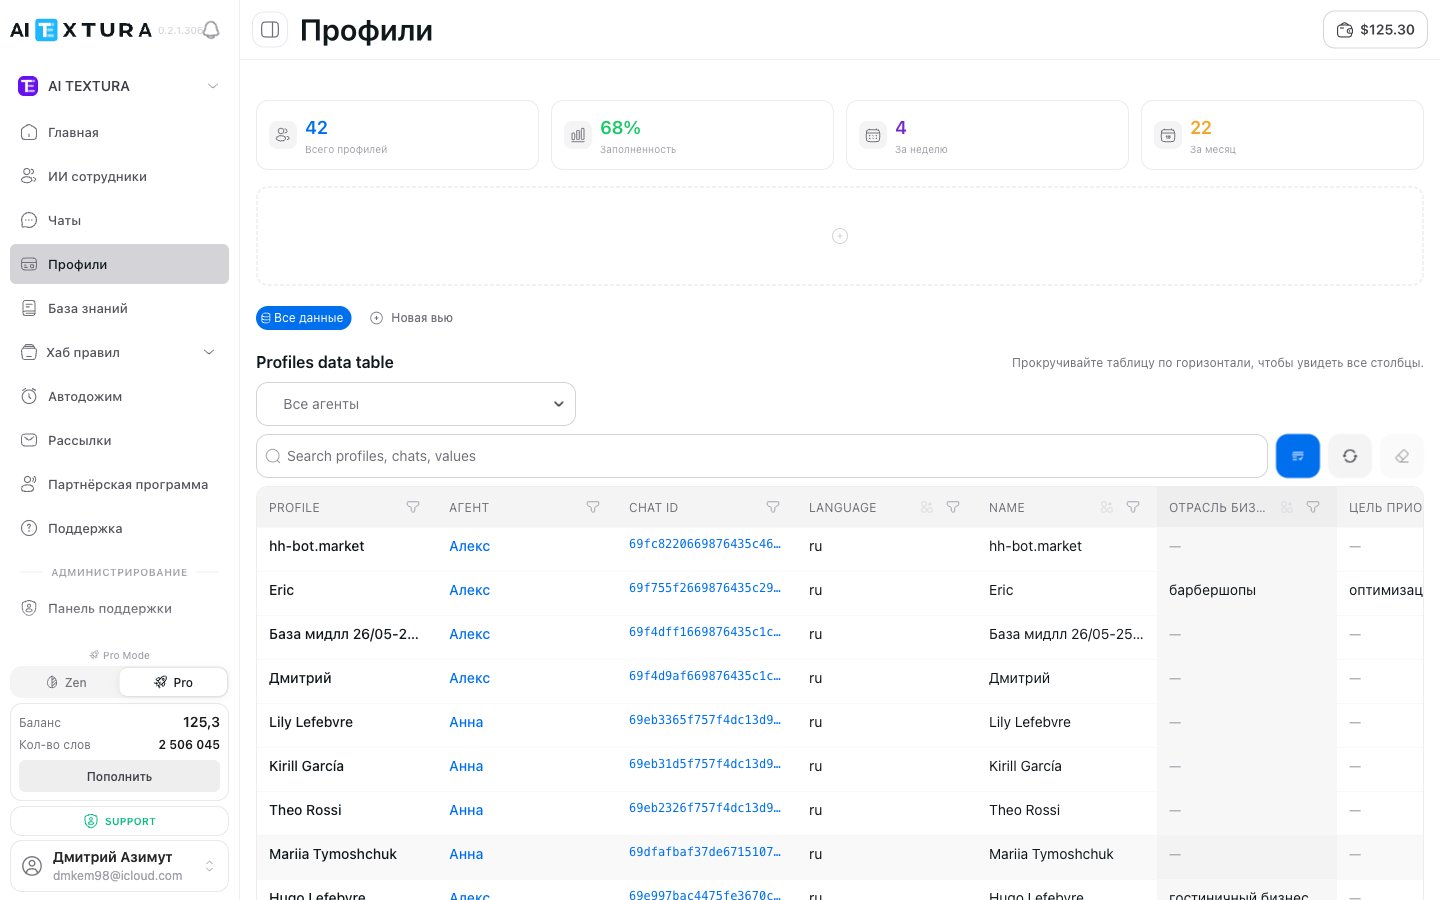
KPI cards
Four summary cards are displayed at the top of the page:| Metric | What it shows |
|---|---|
| Total profiles | Total number of clients across all time |
| Fill rate | Average percentage of fields filled — how thoroughly the employee extracts data |
| This week | New profiles created this week |
| This month | New profiles created this month |
View tabs
Above the table there are tabs:- All data — the standard view with all fields from all employees.
- Saved views — custom views with pre-configured filters, columns, and sorting. Convenient when you have multiple analysis scenarios: “Hotel leads”, “Complaints this week”, “Active requests”.
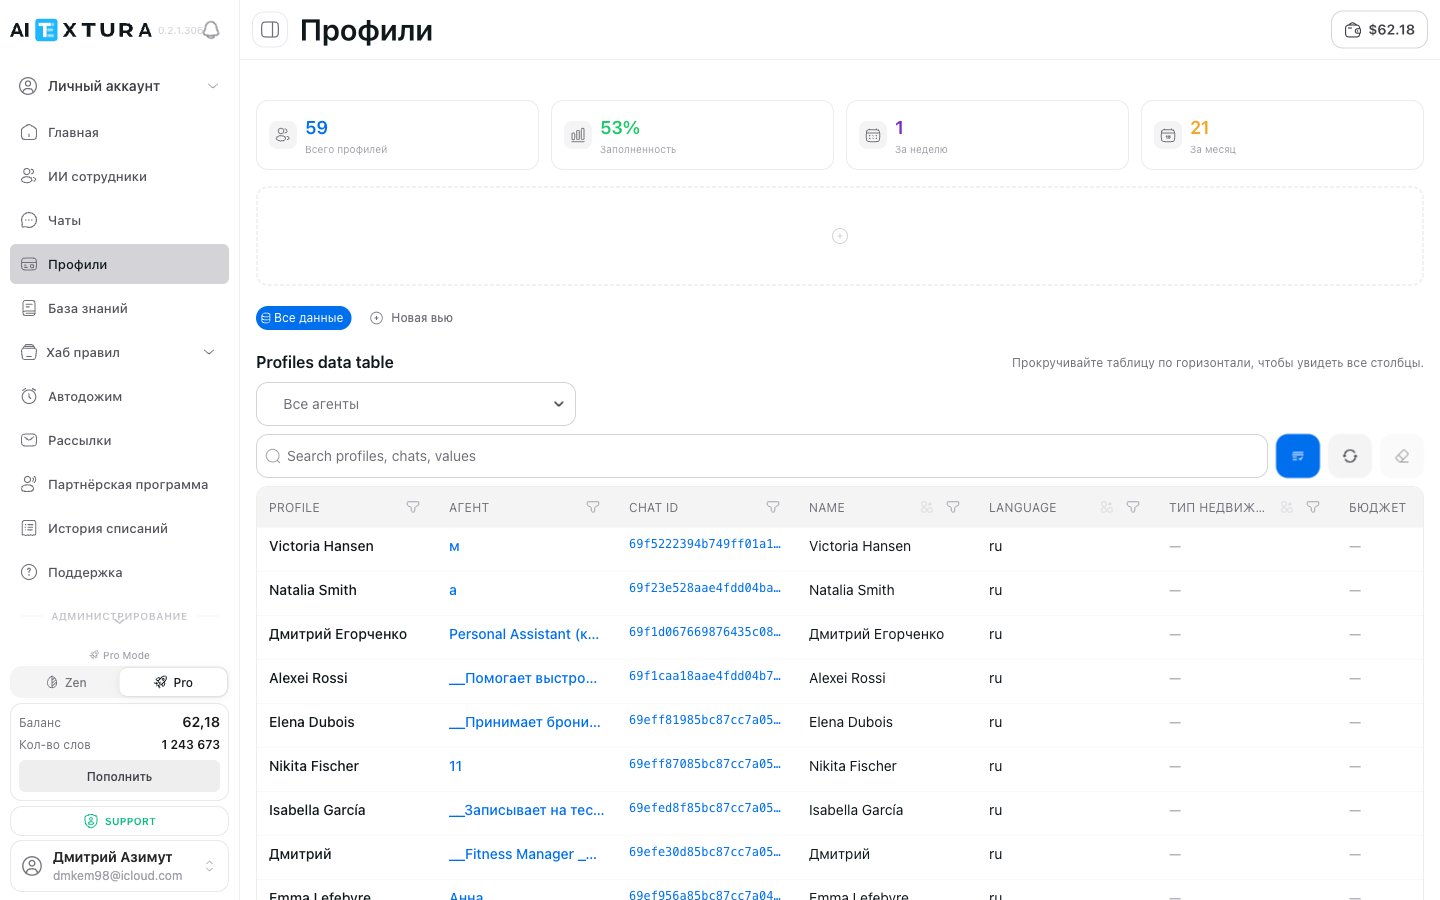
Profile table
Each row represents one client. Standard columns: profile, employee, Chat ID, name, language, summary. Plus all custom fields you have configured on the Profiles tab in each agent (e.g.,industry, purchase goal).
- Filter by employee — view data for a specific employee or branch
- Search by name, field content, or any text
- Go to chat — click on Chat ID to open the full conversation history
- Column management — hide columns you don’t need
- Drag-and-drop column order (new in v2.1.0) — drag column headers with the mouse to arrange them however you prefer. The new order is saved to the current view
- Display modes — switch between Cards and Table views
Usage in Persona
Profile data can be used directly in the employee’s instructions — via profile variables in the Persona section. For example, if the client’s name is known, the employee can address them personally during the conversation. This enables truly personalized communication: taking preferences into account, adapting the conversation style, and offering relevant solutions based on collected data.FAQ
Is Realtime more expensive than Scheduled?
Is Realtime more expensive than Scheduled?
Yes, significantly. Realtime updates the profile after every message and consumes considerably more tokens. Scheduled mode processes data in batches — this is more cost-effective.
Can a Constant value be changed?
Can a Constant value be changed?
No. That is the purpose of the Constant type — the value is set once and does not change. If you are unsure, choose Variable.
Are profiles shared across all employees?
Are profiles shared across all employees?
How many fields can I add?
How many fields can I add?
There is no limit, but it is recommended to add only the fields you truly need — this improves accuracy and reduces token usage.