Persona
Character, style, and role of your employee
Knowledge Base
Documents and information sources
Talents
Integrations and agent skills
Channels
Messengers and platform connections
Video walkthrough
A full end-to-end overview: from creating an AI employee to connecting your CRM — in 30 minutes. The fastest way to get up to speed with the product.Self-Learning informer
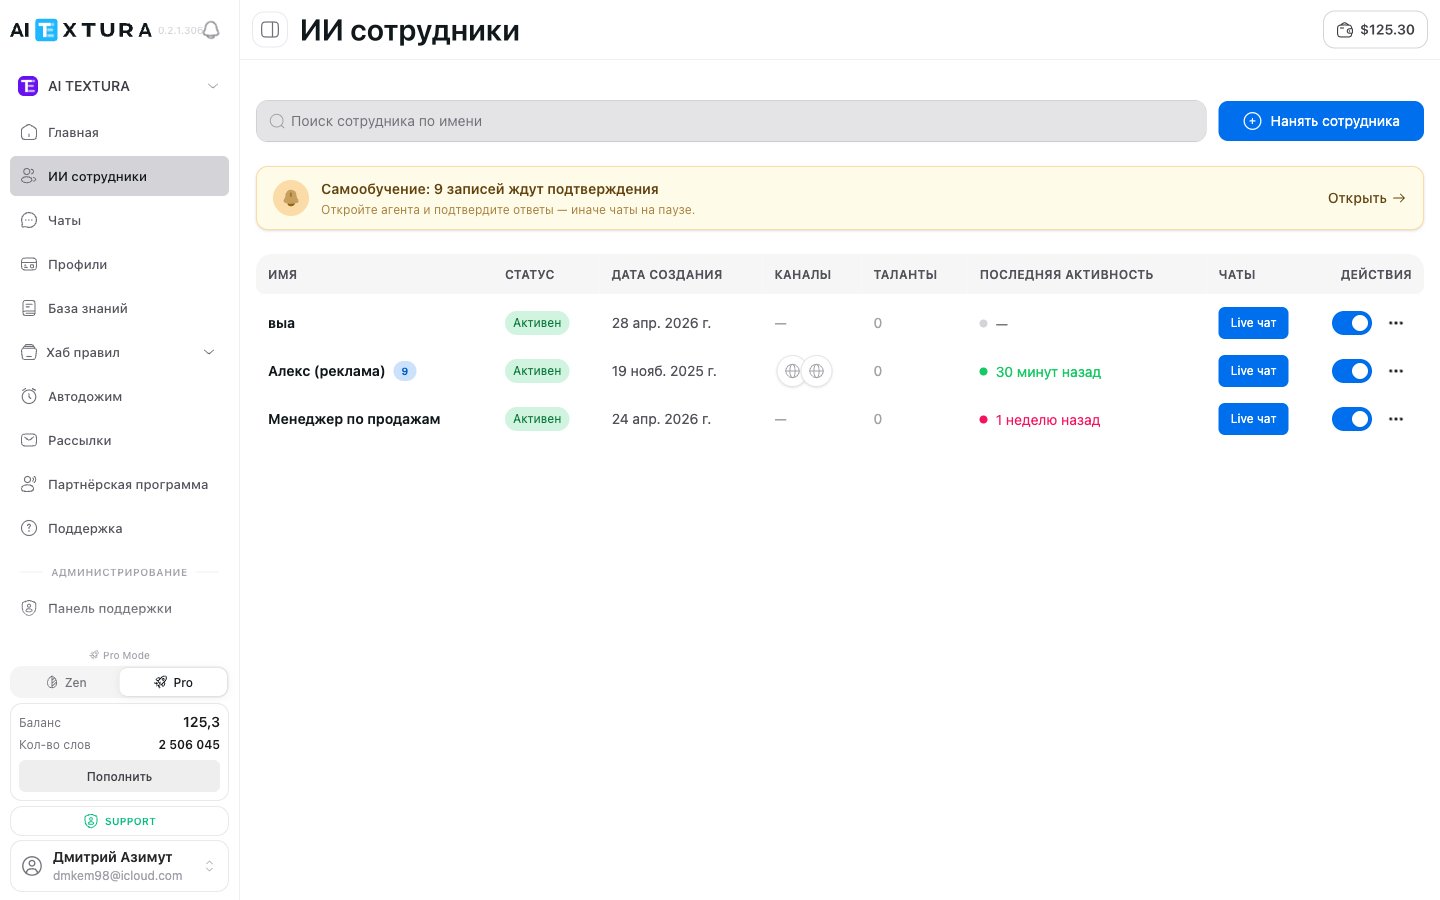
A banner like the following may appear at the top of the list page:Self-Learning: N entries are awaiting confirmation. Open the agent and confirm the answers — otherwise the chats stay paused.This is a signal that one or more employees have accumulated training entries (FAQ self-learning) that require manual confirmation. Until you confirm them, the relevant chats are paused. Open the employee → Self-Learning tab and review the entries. For details, see FAQ / Self-Learning.
Employee table
The main part of the page is a table with name search and a Hire Employee button in the top-right corner. Click any row to open the employee editor.| Column | Description |
|---|---|
| Name | Technical name of the employee. Click to open settings |
| Status | Current state: green Active badge or gray Inactive |
| Channels | Connected messengers and platforms (for example, @BotName · Telegram) |
| Talents | Number of active integrations (MCP tools) |
| Last Activity | Date and time of the employee’s most recent action |
| Live Chat | Button/link to the public Live chat at /live/:id — handy for sharing an agent preview or quickly testing behavior |
| Actions | On/off toggle and … menu with additional actions |
The Live Chat field opens a public dialog page — accessible without authentication, so you can show the employee to colleagues or a client before fully connecting a channel.
Creating a new employee
Click Hire Employee in the top panel. The New Employee dialog opens with three creation paths.Manual — from the template library
Pick a ready-made template from the library. Available presets:
- Personal Assistant — general-purpose personal assistant
- Learning Companion — tutor and learning companion
- Creative Helper — creative helper for copy, ideas, and concepts
- Health & Wellness — health and lifestyle consultant
- Task Management — task and planning manager
- Research Assistant — research and analytics assistant
- Other — empty template with no preset instructions
Automatic — from a website URL
Paste your website address — the platform will analyze its contents, gather key facts (what business it is, services, tone) and prepare a starting employee profile. Convenient if you already have a landing page or a website describing your services and products.
12 tabs in the employee editor
Clicking an employee in the table takes you to the employee editor. The top navigation has 12 tabs. Each is documented on its own page.Full list of tabs
Full list of tabs
- Persona — technical name, display name, avatar, instructions by section (plus Raw XML mode)
- Knowledge Base — folders/documents/articles, tied to “Agent Folders” mode
- Self-Learning — badge with the number of entries (
Self-Learning N) awaiting confirmation - Talents — catalog of 30+ integrations via MCP
- Channel — messenger and CRM channel connections
- Quick Answers — instant-reply templates
- Profiles — client profile field configuration
- Working Hours — employee work schedule
- Auto Follow-up — fallback messaging to clients
- Notifications — alert triggers
- Versions — configuration version history
- Additional — response language, voice (PRO/ElevenLabs), agent commands, behavior toggles
Enabling and disabling an employee
In the Actions column next to each employee there is a toggle:- Enabled — the employee is active and handles messages
- Disabled — the employee is paused and new messages are not processed
Actions menu
The … button in the Actions column contains:- Edit settings — open the employee editor
- Duplicate employee — create a copy with all settings
- Delete employee — permanently delete the employee
Frequently asked questions
How many AI employees can I create?
How many AI employees can I create?
The number depends on your subscription plan.
Which creation method should a beginner choose?
Which creation method should a beginner choose?
The fastest path is Manual with a preset from the library (for example, Personal Assistant or a niche-specific template). If you have a website — try Automatic from URL: the platform builds the initial instructions from your site’s content for you.
Can I duplicate an existing employee?
Can I duplicate an existing employee?
Yes. Click … next to the employee and select Duplicate. A copy with all settings will be created.
The employee is created but doesn't reply to clients. What's wrong?
The employee is created but doesn't reply to clients. What's wrong?
Check three things:
- Status — must be Active
- At least one Channel is connected
- Working Hours — the employee may not be on shift right now
What happens if I delete an employee?
What happens if I delete an employee?
The employee is deleted together with all settings. Deletion is irreversible.
What does the Live Chat button in the table show?
What does the Live Chat button in the table show?
Best practice
One employee — one job. Two narrowly specialized employees outperform a single universal one. Narrow instructions produce higher-quality responses.
Test through
Show chat. Before connecting a production channel, verify behavior in the embedded test chat on the employee page — it’s free and instant.